OBVIOUSLY, as my favourite colour, I have the natural tendency to add a smidge of my beloved fuchsia food colouring to any/ every recipe that would otherwise be beige. However, Valentine’s really is an occasion where eating pink food gel really is encouraged. And so, (love or not) it’s an occasion a completely endorse.
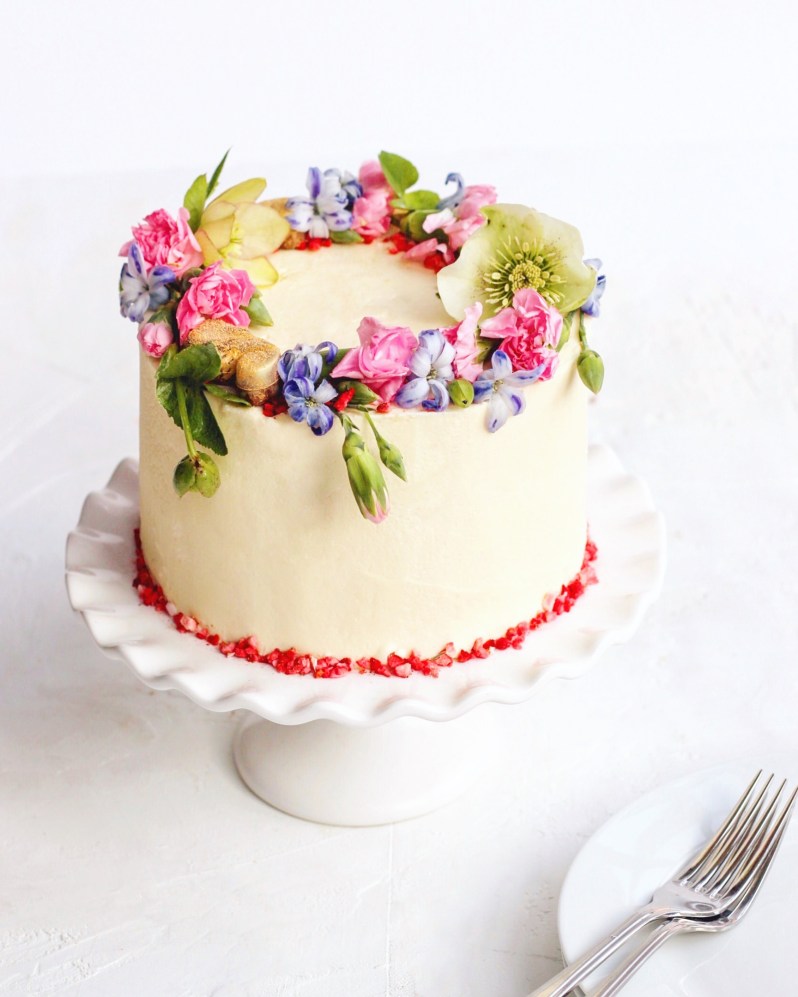
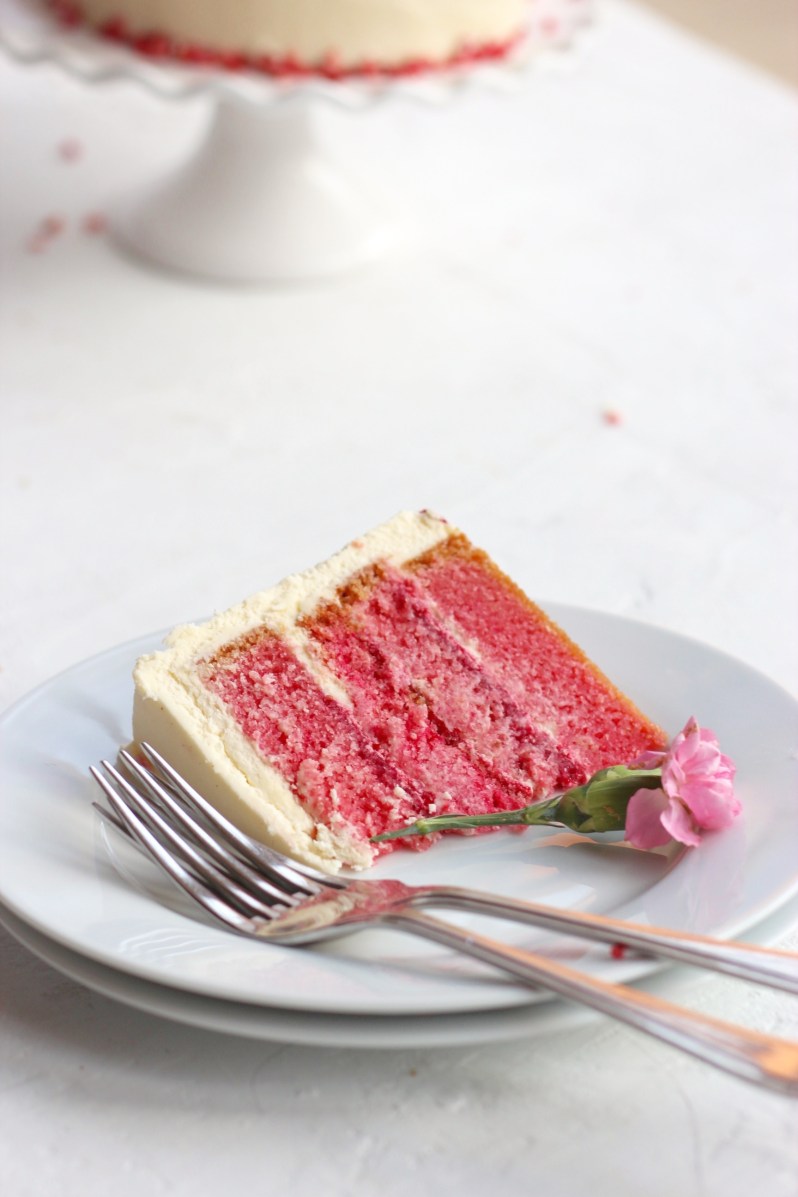
My Pink Velvet cake embodies its red velvet cousin, with a silky cream cheese frosting sandwiched between each layer. But, instead of the addition of cocoa to the sponge, I decided to leave mine as a vanilla body and supplemented the layers with a sprinkling of white chocolate chips.

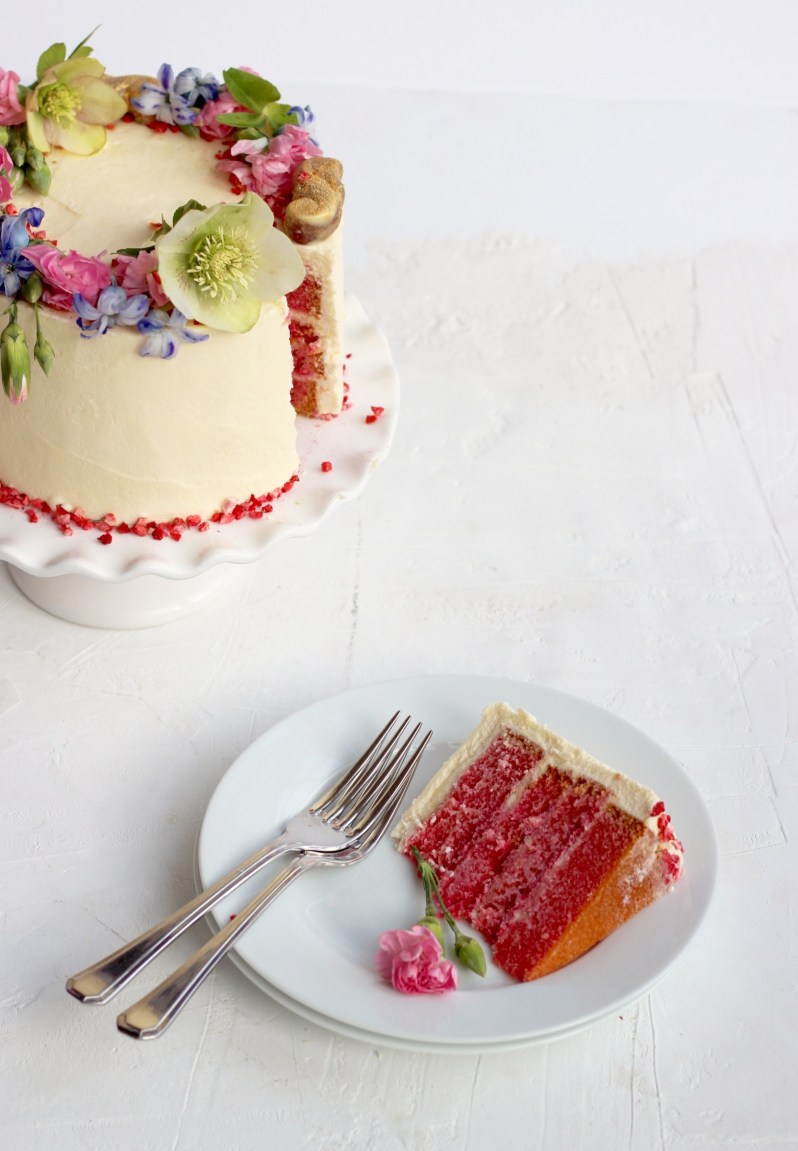
I then decorated with some fresh flowers, gold-dusted (yes, slightly outlandish) Guylian chocolates (aka chocolate OF THE GODS), and freeze-dried raspberry pieces. YUM.
The perfect cake to bake for your loved ones, or yourself.
Happy Valentine’s xxxx
INGREDIENTS – makes 1x 6 inch cake – cut into 3 layers
- 225g butter, room temperature
- 4 medium eggs, free range
- 400g caster sugar
- 1 tsp. baking powder
- 300g self-raising flour
- 240ml milk
- pinch of salt
- 1/4 tsp. fuchsia food gel – it’s important to use a strong food gel here and not a liquid colouring.
- 2 tsp. vanilla bean extract
Cream Cheese buttercream:
- 225g cream cheese, softened – I use Philadelphia
- 60g butter, softened
- 220g icing sugar
- 1 tsp. vanilla extract
Vanilla buttercream:
- 250g butter, softened
- 550g icing sugar
- 2 tablespoons milk
- 1 tsp. vanilla extract
- 1 large packet of white chocolate chips/ buttons
METHOD:
- Start by preheating your oven to 170°C, and grease a 6inch cake pan with butter.
- In a large mixing bowl, beat together the softened butter and caster sugar for 3-5 mins until pale and fluffy.
- Next, crack in the eggs one by one, beating vigorously in between each.
- Sift in 100g of your self-raising flour, the salt and baking powder until incorporated.
- Next, add in half the milk along with the vanilla and the food colouring and mix.
- Add another 100g of sifted flour to the bowl and once incorporated, add the remaining milk.
- Finally, sift in the final batch of flour and fold gently.
- Pour the cake mix into your tin, and pop into the centre of the oven to bake for approx. 20 mins, or until the sponge is golden brown, and springs back to the touch.
- Whilst the cakes are cooling, make your cream cheese buttercream.. start by draining the cream cheese of any liquid – I normally dab mine with some paper towel.
- Next, whisk together your butter and cream cheese with an electric whisk until smooth and incorporated. Add in the vanilla.
- Sift in the icing sugar in 3 batches, whisking in between each one until you end up with a silky smooth frosting.
- For the vanilla buttercream exterior, start by whisking your softened butter for 3 minutes on high-speed until paler in colour.
- Sift half of the icing sugar into the bowl, and whisk. Add half of the milk and the vanilla extract and stir.
- Repeat the step above with the remaining icing sugar and milk until you have a thick buttercream.
- To assemble the cake, cut your sponge into 3 equal layers.
- Place one layer on a cake board, and top with 1/2 of the cream cheese frosting. Spread until you have a 1/2 inch bored around the perimeter.
- Sprinkle 1/2 the white chocolate chips on top, generously!
- Repeat the step above with the next layer, and finally sandwich the remaining sponge on top.
- Use 1/3 of the vanilla buttercream to lightly crumb coat the whole exterior of the cake. This is to prevent crumbs in the buttercream and to give a beautiful clean finish.
- Once coated with a thin layer (you should still see the cake poking through the buttercream), leave to set in the fridge for at least 30 mins to firm up.
- Finally, coat the remaining buttercream evenly over the cake with an offset spatula.
- Decorate with fresh flowers or anything you like.
Lots of love, Sofia xxx

Beautiful and fantastic cake! 💖
LikeLike