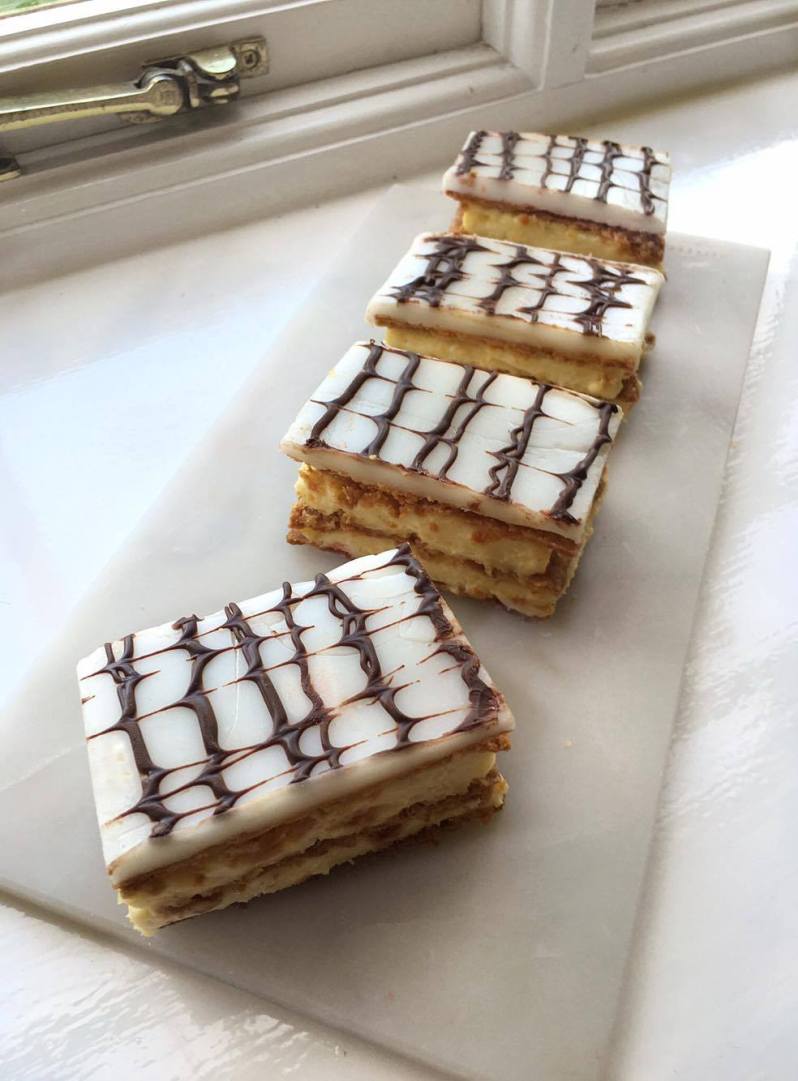
Mille Feuille, aka “a thousand leaves”… the yummiest, most delicate, buttery, creamy french pastry which is soo delicious and DEFINITELY worth all the hassle and time involved in making this complex little cake!

I followed Paul Hollywood’s recipe for the pastry element of this bake – his rough puff pastry recipe is a lot shorter and less complex than making traditional puff pastry. I altered the recipe slightly, as I like to leave my pastry to chill for longer than the recipe allows, to make sure it
I then followed another recipe to make the filling… Diplomat cream is a traditional pastry cream, that has been lightened with whipped cream and stabilised with gelatine, it’s the most beautiful and fluffy thing I have ever made! ❤

I used roll-out fondant icing for the topping of my mille fuille – I heated it in a saucepan with some liquid glucose and poured it on the pastry which worked well… but then I distracted (typical), and by the time I got around to finishing the Mille Feuille with my melted dark chocolate, the icing had hardened 😦 This made my chocolate zig-zag pattern embarrassingly messy! So make sure you work fast in the final stage!

Happy Baking ❤
Ingredients:
- 450g plain flour
- 180g butter, frozen + 75g butter, cold
- pinch of salt
- 4g leaf gelatine
- 50g egg yolk (roughly 2 or 3)
- 60g caster sugar
- 25g cornflour
- 250ml milk
- 25g butter
- 250g white fondant/ ‘ready to roll’ icing
- 30g liquid glucose (you should be able to find this in big supermarkets)
- 40g dark chocolate
Method:
- Start by making the rough puff pastry – in a mixing bowl, rub the chilled butter (75g) into your flour and salt using your fingertips until you get a sandy-breadcrumb mixture
- Add 4-6 tablespoons of water to the dough gradually, until it forms a dough
- Roll your pastry out into a large rectangle. Imagining your rectangle has been cut into 3 smaller rectangles, grate your frozen butter over the bottom two thirds of the rectangle. Fold down the empty top third onto the buttered middle third (as if you were closing a leaflet), fold the bottom third with the butter ontop of the two thirds which have just been folded together – you should get layers of dough-butter- dough-butter-dough.
- Turn your dough 90 degrees on your work surface, and roll into a rectangle (the seam you’ve just made from folding should now run along one of your longer sides of the new rectangle)
- Wrap in clingfilm and place in the fridge to chill for 1-2 hours.
- Heat your oven to 200°C and line 2 or 3 baking trays with baking parchment. Remove your pastry from the fridge and split into 3 equal sized pieces.
- Roll each piece into a rectangle with measurements of roughly 30 x 2, and a thickness of 5mm. Trim the edges of the pastry so they are nice and straight. Place onto your lined baking trays and pop back into the fridge for 20-30mins (essential!) 🙂
- Here is why you need to rest your pastry – chilling your pastry is super super important! It allows your butter to resolidify after handling – so the butter is evenly distrubuted and the pastry holds it shape. Chilling also allows gluten strands (the protein found in wheat flour) which have been formed, to relax. As well, it also allows the diffusion of water throughout the dough!
- Take your pastry out of the fridge, and cut your rectangle into 3 strips, each being roughly 8cm wide
- Dust your rectangles with icing sugar (which will caramelise the pastry in the oven). Place another piece of baking parchment on top of your pastry to completely cover it, then place another baking tray on top of the pastry and baking parchment – this acts as a weight, and ensures your pastry rises evenly and stays crisp!
- Bake the pastry for 10-15 mins, until golden brown all over. Place carefully on a cooling rack and leave to cool.
- For the diplomat cream, place your gelatine leaves in a bowl of v. cold water
- In a large bowl, whisk together your egg yolks and sugar until the mixture has doubled in size and is pale in colour. Whisk in your cornflour.
- In a saucepan, bring the milk and vanilla bean paste to the boil. Once bubbling, pour a third of the milk on top of the egg yolk mixture and whisk until incorporated. Return the mixture into the saucepan with the milk, and place back on the heat.
- Whisk your pastry mixture constantly until it starts to thicken. Count down from 45 seconds, and remove your thicken pastry cream from the heat.
- Remove the gelatine from the water, and squeeze out any excess liquid. Place in the gelatine and butter in the pastry cream and whisk until incorporated. Leave to cool completely.
- Once the pastry cream is cool, whisk your cream with a handheld electric whisk until your achieve stiff peaks. Whisk 1/3 of the cream into the cooled pastry cream until incorporated. With a spatula, fold in the remaining 2/3 of the cream gently.
- Assembling the Mille Feuille:
- Take 3 of your puff pastry strips.
- Using a piping bag fitted with a round nozzle, pipe your diplomat cream onto two of the long strips of pastry.
- Place one piped pastry strip on top of the other pastry strip that has pastry cream ontop. Place in the fridge whilst you make the topping.
- Place your fondant icing and liquid glucose in a saucepan, and melt until it has a thin consistency (if its looking thick, add some more glucose syrup 🙂 )
- Melt your dark chocolate in a microwave using 20s bursts on a high setting. Place into a piping bag with a tiny tip – a few mm in diameter (I made my own piping bag which is super quick and easy! Check the link here)
- Pour the fondant icing over the strip of pastry which is going to be the top (so for every 3 strips of pastry you’ve made, cover one in fondant!)
- Spread with a palette knife. Pipe your dark chocolate onto the icing in long lines, spanning the length of the mille feuille. Take a toothpick and fan the chocolate – to do this, drag the dark chocolate in lines perpendicular from the way you piped the chocolate – alternating which direction you drag the chocolate each time – this video explains everything so well!
- Place your iced pastry strip ontop of the layers of pastry and cream. Slice into pieces as you desire 🙂
- NOW EAT WOO!!!
Please do comment with any questions you have, this is a long recipe but the result is definitely worth it 🙂 Love from Sofia ❤ xxx