“Om nom nom nom”… there is NADA to dislike about these macaron. Yes that rhymed (if you pronounce macaRON (as in maca-Ron Weasley) correctly), and yes that statement has been eminently backed by meta analysis, cross-sectional randomised laboratory studies based in my kitchen.
Ok so my family were forced to eat a macaron or two and agree to my nagging shriek ‘DO YOU LIKE THEM?!?!?’ before they could finish their first bite.


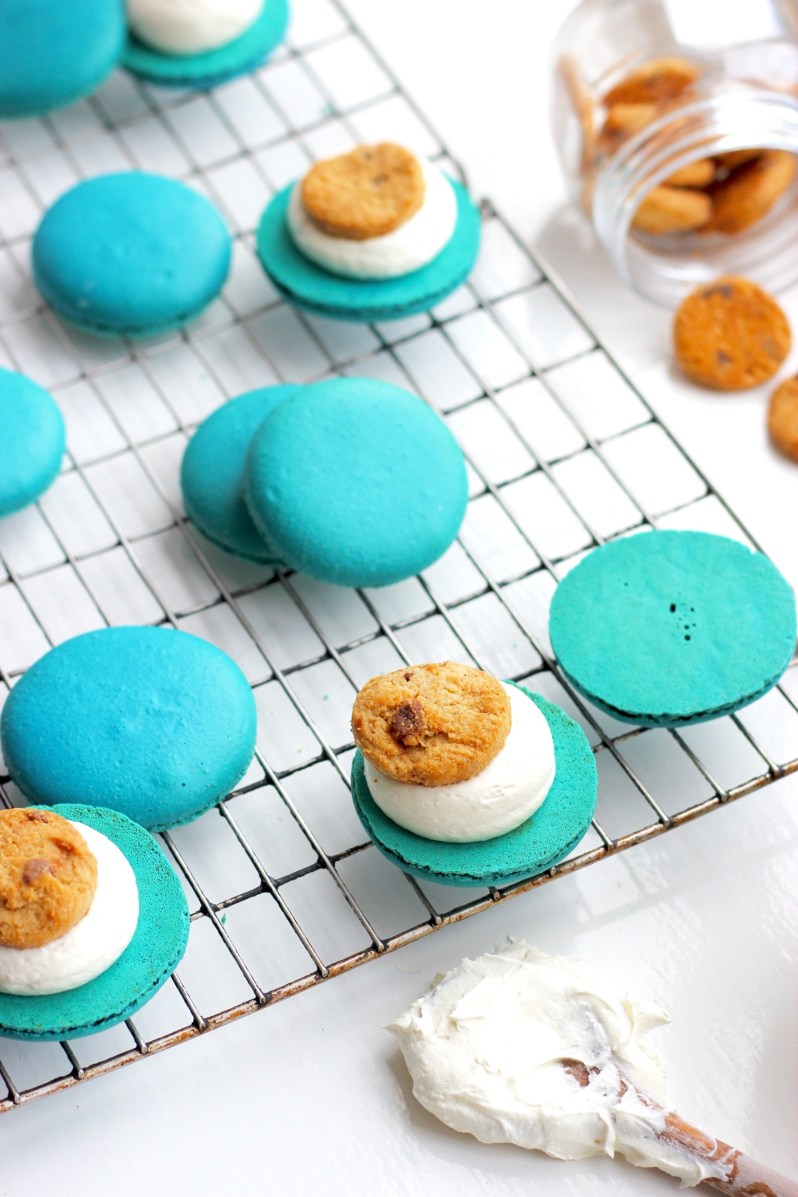
These strikingly beautiful azure blue shells are sandwiched with a silky smooth vanilla buttercream, and a soft mini chocolate chip cookie. Mmmm. I chose to buy mini cookies rather than bake them myself, just to save a bit of time. It’s important to try and get a mini cookie that is soft and chewy, rather than a hard crunchy one. The softer chewier chocolate chip cookie with give a nice contrast to the macaron shell, and give a beautiful mouthfeel.

The overall flavour profile is deliciously delicate and sweet, and reminds me of eating cookies with a glass of milk aka HEAVEN.

I hope you LOVE this recipe! Here goes…
Ingredients:
- 130g ground almonds
- 130g icing sugar
- 90g caster sugar
- 100g egg whites
- A pinch of salt
- Blue food colouring gel – it’s important it’s a blue gel and not a liquid colouring because a lot of them aren’t heat stable in the oven
- 140g butter, room temp
- 280g icing sugar
- 1 tsp. vanilla extract
- Some mini cookies – I shop brought mine for convenience. Try and get ones that aren’t too crunchy. A slightly softer/ chewier cookie will give a nice contrast in texture from the
Method:
- Line 2 baking trays with parchment paper or a silicon mat.
- Sift together your ground almonds and icing sugar (the 130g batch) together into a bowl, discarding large lumps. I also like to give my ground almonds and icing sugar a whizz in the food processor – so the consistency is super fine.
- In a clean glass bowl, whisk your egg whites until foamy and frothy. Add you salt and continue to whisk until ‘soft peaks’ – this is when the egg whites are starting to get thicker, but don’t yet retain their shape. Add your caster sugar in 3 stages and continue to whisk until you get a nice glossy meringue – I would say for another 2 or 3 minutes.
- If you want to colour your macaron shells, add a blob of food colouring gel to your egg whites at this stage.
- Next, add 1/3 of the almond mix into the egg whites and fold with a spatula. With your spatula make figures of 8 patterns, scooping the ground almond mix around and down in the meringue. You don’t have to be too delicate at this stage!
- Add the rest of the almond mix and continue to fold gently. This stage is called ‘Macaronage’, and is so critical!
- Stop folding when your macaronage has a ‘lava-like’ or honey consistency – this consistency is thinner than I had ever been achieving before I started using Mimi’s recipe. Another great tip is to draw out a figure of 8 into the macaronage with your spatula – if the trails of the macaronage mix stay in place then it is ready (see pic below). Check this if you’re at all worried! 🙂
- Next, fill up your piping bag, and pipe the macaron mixture into equal sized circles.
- After piping, bang your tray on top of your work surface… by tap I mean actually hit your baking tray down onto the surface with quite a force. This is to get rid of any air bubbles in your shells which cause cracking when baking. I tap my tray about 3 or 4 times, but try not to get carried away..!
- If there are any visible air bubbles on the surface of your macarons, pop them with a toothpick.
- Next, turn on your oven to 160°C.
- Leave your macaron shells to rest on a work surface for around 30 mins. This is so your shell’s develop a ‘skin’, which allows little macaron ‘feet’ to form when baking. I have always rested my macarons, although some cookery books will miss out this step. You’re looking for the appearance of your shells to become matte and not shiny on the surface, this could take 15 mins, or even 45!
- Place one baking tray into the oven at a time, and bake for 12-14mins. Your macarons should have little feet forming, and turn a very pale golden colour.
- Gently remove the shells from your baking parchment, and leave to cool.
- Now it’s time to make the buttercream! Start by placing your softened butter in a bowl/ freestanding mixer, and beat for 3-4 mins until pale and smooth. This will produce the fluffiest buttercream.
- Next, sift in half of your icing sugar into the butter, and beat until smooth and consistent. Once consistent, sift in the remaining icing sugar and vanilla extract and beat again.
- Now its time to assemble. Pair up your shells that have the same size (sometimes mine vary slightly), to make a top and bottom of the macaron.
- To assemble your macarons, pipe a blob of buttercream (roughly covering 3/4 of the surface of the shell) into the centre of one of the pairs of macaron shells.
- Place a mini cookie just off centre and place the lid macaron on top at a slightly slanted angle – to make it look like the cookie monster is eating a cookie.
- Ta Da!! It’s as simple as that! Now sit back and enjoy your macaron with a cup of coffee.
Don’t forget to comment if you have any questions or queries 🙂
Lots of love,
Sofia xxx

OMGoodness! How absolutely GENIUS!!
LikeLike